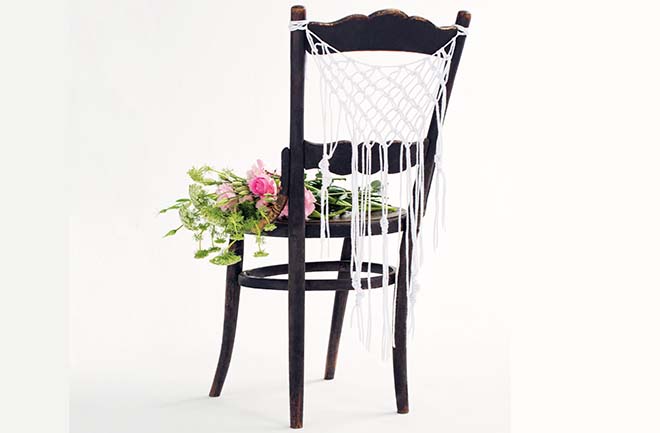
We may think of it as out of date but there’s a reason the older generation enjoyed a macramé piece or two – they’re decorative without being overwhelming. And, in today’s modern age, they add a touch of nostalgia to a rustic wedding theme. If you like the idea of a macramé touch, try your hand at this chair drape that adds a subtle yet quaint feel to a summertime wedding.
What you’ll need
• Rod or stick
• 15 strands of 2m string
• Scissors
How to do it
1 Suspend your rod in a horizontal position. Take one strand of string and attach it to both ends of the rod to create a hanging base loop. Starting at the far left, take one strand of string and hang it over the suspended string. Pull both ends through the resulting eyelet. Repeat this with the remainder of the strands, leaving a distance of 1.5 cm between each set.
2 Again starting at the left, take the first set of strands in your left hand and the second set in your right. Spread the strands of each set between your fingers with the centre strand of each set touching.
3 Taking the strand at the far right, move it between the two centre strands and bring it forward between the strands of the set on the left.
4 Bring the strand across the front of the centre strands and back between the loop formed by the set of strands on the right. Then pull the strand tightly towards the top.
5 Taking the strand at the far right, move it behind the centre strands and push it through the loop formed by the set of strands on the right. It should form a second loop.
6 Take this loop across the centre strands and push it through the left loop of the set of strands on the far left.
7 Pull tightly and let go.
 8 Repeat this process (steps 2–6) with each of the next sets until the first row is complete.
9 For the second row, start at the second and third sets of strands and repeat steps 2–6 until the row is complete.
10 For the third row, start with the two sets of strands at the far left and repeat steps 2–6 until the row is complete.
11 Continue using two sets of adjacent strands to form diamonds until you reach your desired length.
12 Once you’ve reached your desired length, cross two sets of strands at the far left. Take one set over and backwards in-between the two sets. Pull tightly to form a knot.
13 Make multiple knots using the same set of strands until you reach your desired length of knot.
14 Repeat steps 12-13 with the rest of the adjacent sets of strands to create knots. Then use the scissors to cut the ends of the strands to your desired length.
15 Untie the horizontal base from the rod and attach it to the sides of a chair so the macrame falls across the chair back. Repeat for as many chairs as required.
Find this DIY and more in Issue 1-2017, on sale now.
Text & styling Francoise Jeanne de Villiers
Photography Kendall-Leigh Nash/HMimages.co.za


