• Category

    Our DIY

    Category

    Creating meaningful keepsakes is one of the most touching parts of a wedding. In 2025, couples are getting creative, moving away from traditional guestbooks to interactive, visually impactful, and personal memory-making stations. Here are inspiring ideas + tips to bring them to life.

    DIY Photo Booths: Fun, Interactive & Memorable

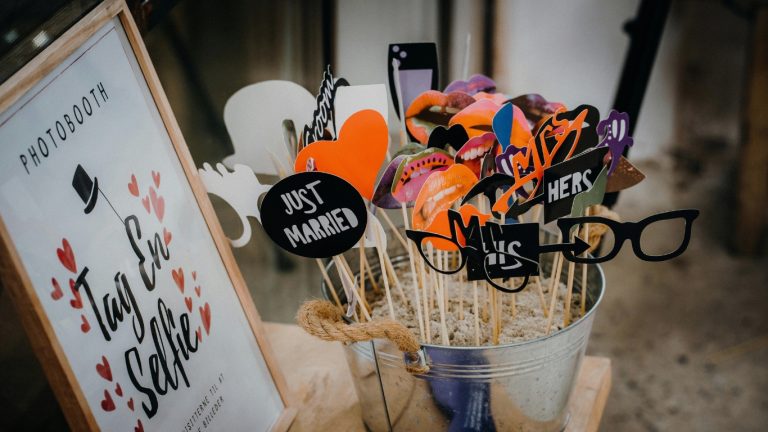
    Putting together your own photo booth adds both entertainment and keepsakes. Ideas include:

    • Backdrop & Props: Use themes that match your wedding style—rustic wood, floral frames, greenery, vintage frames, or fabric drapes. Props make it playful (hats, signs, masks).

    • Instant Cameras / Polaroids / Instax: Guests take instant prints to stick into a guest book or photo wall. This doubles up with messaging.

    • Remote triggered DSLR or mirror-booth setups: Let guests trigger photos themselves; combine with prints or digital uploads.

    • Photo guestbook combo: After each photo, guests tape/stick the image into a guestbook and add a message. This creates a fun visual diary of the day.

    Guestbook Alternatives: Keepsakes Beyond the Book

    Traditional guestbooks are still lovely—but many couples are choosing alternatives that better reflect their personalities or become artful displays.

    Some ideas:

    • Thumbprint Tree: Guests leave thumbprints as “leaves” on a printed tree, then sign next to them. Makes for a visual piece to display.

    • Jenga Blocks or Building Blocks: Guests write messages on wooden game pieces / blocks. Later you can display or even play with them as a couple.

    • Message / Advice Cards: Provide cards where guests write marriage advice, wishes, or memories. Collect them in a box or display them.

    • Wishing Tree: Guests tie/tag messages onto a tree or branches. Very decorative.

    • Vinyl Record / Board Game / Canvas Art: Use a vinyl record or customised board game, sketch or painting canvases, or other items (tiles, wood panels) that guests sign or decorate.

    Memory Jars & Other Keepsake Containers

    Memory jars are charming and sentimental and can be combined with guestbooks or stand alone.

    • Memory / Advice Jar: Guests write messages or date-night ideas, fold them, drop into a jar. After the wedding, you can draw one message whenever you want a reminder.

    • Postcards in a Jar: Pre-printed postcards; guests write on them and drop them in. Later you can read them on anniversaries.

    • Bottle of Wishes: Similar to a memory jar but with glass bottles, maybe multiple small bottles for different types of messages (humour, love, advice).

    • Artifact Jars: Guests contribute small items (if possible) or tokens related to travel or culture—e.g. pebbles, ribbons, feathers—alongside messages.

    Practical Tips to Make These Ideas Work

    • Set up clearly: Provide pens, tape/glue, props, signs/instructions so guests know what to do.

    • Visibility: Put stations in well-trafficked areas so people don’t miss them (entrance, near food, cocktail area).

    • Durability: Use materials that hold up, thick paper, acid-free paper for guestbooks; permanent markers; protect photo prints if needed.

    • Backup plan for weather (if outdoors).

    • Assign someone to maintain/refill supplies (glue, pens, photo paper).

    Why These Ideas Make a Difference in 2025

    • More personal, interactive experiences are in demand.

    • Guests like doing something fun, not just signing a book.

    • Keepsakes become part of home decor and remind couples daily of that special day.

    • Many of these ideas are budget-friendly yet meaningful.

    Featured Image

    Weddings are incredibly meaningful days for everyone in attendance. However, for those that have lost loved ones, they feel that emptiness. One bride decided to fill that void and give her groom the wedding gift of a lifetime when he could hear his late brother’s heart beat again.

    When he was only 13-years-old, Derick Smith’s brother Jake was hit by a car and killed. His family donated his organs, hoping that Jake would live on and do good things for others in need. Now an adult, Derick and his family have never had the opportunity to meet anyone that received Jake’s organs. Until now.

    Derick’s future wife, Katy, wanted to give her husband-to-be a gift he would treasure forever: the opportunity to hear his brother’s heart beat again. She thus decided to find the woman who received Jake’s heart.

    “I had asked Derick’s mom, I said, you know this is going to be a really personal question, and you can tell me no, but I’m really interested in trying to find the person that received Jake’s heart and would you be willing to do that?” Katy told Inside Edition. “She cried and she was really happy and she said, ‘Absolutely, I think this will be a great idea’.”

    After a year of searching, Katy found Gracie Wilkinson.

    “I found out her name and I found her on Facebook, and so I sent her a message… within two minutes she responded saying, ‘Absolutely, I would love to be there, just tell me when and where and I will be there,’” Katy said.

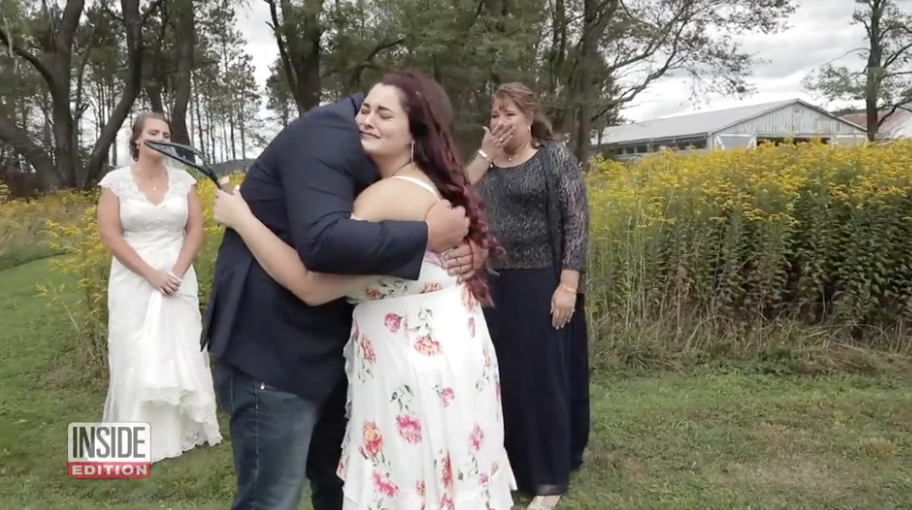
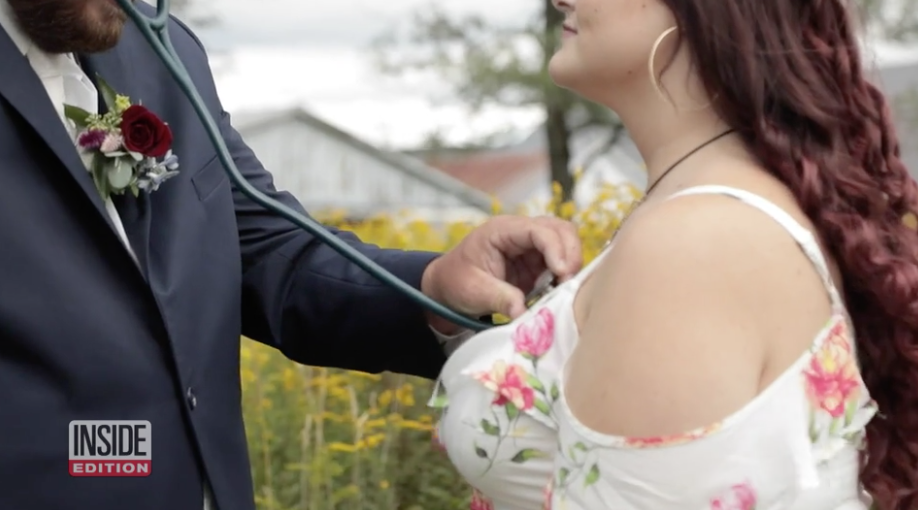
    On their big day, Derick and Gracie had a heartfelt embrace and shared many tears. Derick was able to listen to his brothers heart again, and Gracie gifted him with a keychain with an image of his brother’s heartbeat from an EKG.

    Credit: Inside Edition
    Credit: Inside Edition

    “What it was like to hear his heartbeat was a flood of different emotions,” Smith said of the moment.  “There’s not a word to describe it. She gave me the gift of closure.”

    And it meant just as much for Gracie, who was only 6-years-old when she received Jake’s heart,

    ”Getting to meet everyone and getting to be part of their day and a part of that moment for Derick and kind of bringing Derick some closure from losing his brother means the absolute world to me,” she added.

    Image: Inside Edition

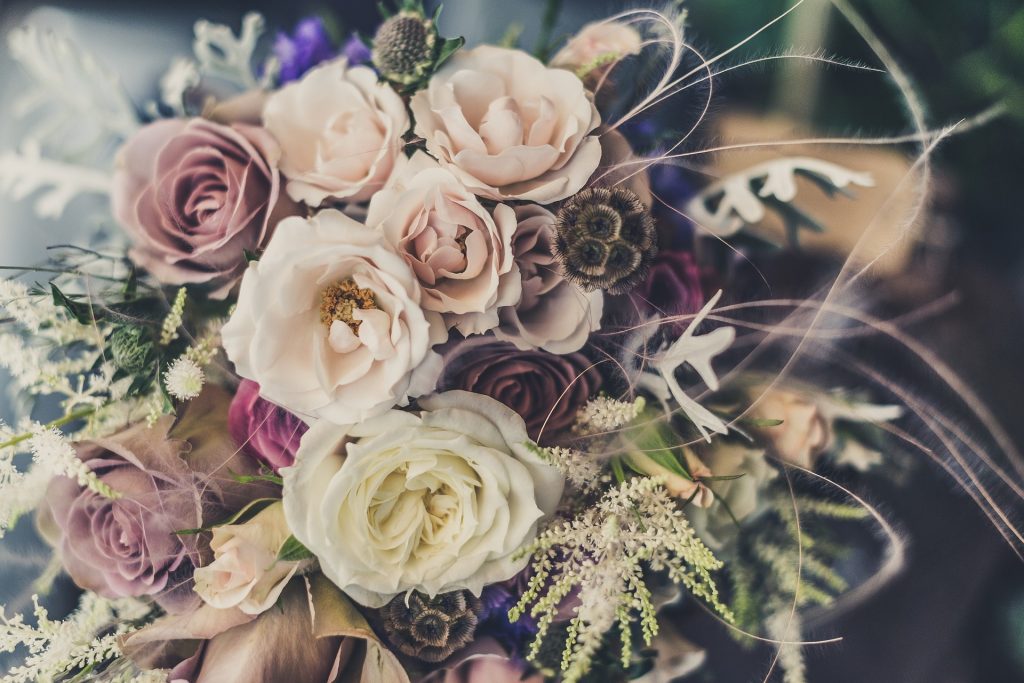
    A bride’s bouquet has sentimental value and so it is not surprising that many brides want to keep it. Preserving your bouquet is a beautiful way to create a reminder of your wedding day and add some decor to your home at the same time.

    If you’d like to have a personal keepsake from your wedding that is different to the norm, take a look at these 3 ways to preserve your bouquet.

    Air dry your bouquet

    This is the most simple and traditional way to preserve your bouquet as it was on your wedding day, but it will take the longest.

    All you have to do is take your entire bouquet, or just the flowers that you’d like to keep and tie it together very tightly with a rope or string of your choice – twine will work very well. Once you are sure that the bouquet is tied tightly and securely, hang the whole bunch upside down in a warm and dry area, like a cupboard. A darker space will preserve the colour and scent of the flowers, although the colour will be slightly muted, better than a space that allows light in, which will cause the colours to turn into shades that look vintage. Leave the bouquet to dry for a few weeks and then take it down once all the flowers are completely dry.

    Now that you have your dried bouquet, you can do with it as you wish. A nice idea to display the bouquet is to place it in a vase of your choice and cover it with a large glass dome or a perspex case.


    View this post on Instagram


    A post shared by Сухоцветая Флористика (@vereskbureau) on

    Press the flowers

    This is probably the most affordable option when it comes to preserving your bouquet but it will involve you creating a new piece from the flowers from your bouquet.

    Choose the flowers that you’d like to preserve and cut about 1-2cm off and spread them out on one or multiple sheets of baking paper, depending on how many flowers you are wanting to press. Place the sheet with the flowers on the inside of a heavy book and add another layer of baking paper on top, then close the book and place another heavy object on top to weigh it down. Leave the flowers there for one to two weeks. Once the flowers are dry and flat, be careful when you start to arrange them as they are very delicate.

    Most people create a frame display of the flowers by putting them into an empty photo frame and then hanging it on the wall as decor.  Now every time you walk past it you will be reminded of your special day.


    View this post on Instagram


    A post shared by Lacie RZ Porta ? (@framedflorals) on

    Use epoxy resin

    With this preservation technique, you will be able to show off your flowers to their full effect as the shape of the flowers will remain the same.

    Choose flowers with tight petals from your bouquet and hang them to dry. If you do not allow them to dry properly before setting them in epoxy, they may begin to decay once they have been set. Then cover your work area with newspaper and make sure you wear gloves when you work because epoxy sticks to everything. Choose a mould in your desired shape and make sure that you have enough epoxy resin to cover the flowers as well as create your desired shape. Fill your mold halfway with the epoxy resin mixture and delicately arrange the flowers within that. Then fill in the rest of the mold with the mixture and leave to dry.

    After you take the mold off, you will have a stunning decoration, or a few if you do this multiple times, that you can place all over your home and have constant reminders of your wedding.


    View this post on Instagram


    A post shared by Rejoiceandblossom (@rejoiceandblossom) on

    Feature image: Pixabay

    A cute and fun DIY idea for wedding decor – create origami hearts that you can place on tables or arrange them on a photo frame for a focal piece.


    View this post on Instagram


    A post shared by C CHANNEL-ヘアアレンジ.ライフスタイル.DIY動画 (@cchannel_girls) on

    Supplies (find them at your nearest craft shop):

    • origami paper R78/24 sheets
    • glue R50/100ml
    • photo frame R190/300 x 500mm
    • double-sided tape R30/18mm

    Steps:

    1. Fold the origami paper up and down, left and right.
    2. Open the paper again and fold left and right into the centre. Keep it there.

    3. Fold the top and bottom into the middle and fold the top down.

    4. Fold the bottom up in the same way.

    5. Fold the bottom part to the left and right according to the crease.

    6. Similarly, fold the upper part to the left and right according to the crease.

    7. Fold in the top and bottom corners

    8. Fold the upper right and the lower left so that they widen.

    9. Fold the top and bottom so that the front is a solid.

    10. Push in the left and right corners and the centre of the 3D part

    11. To complete the 3D heart, tuck in the folds at the bottom so that they fold over one another and stay in place.

    12. Then glue the open sides of the heart. If you’d like to scatter the hearts around, then this is the last step.

    13. If you’d like to arrange the hearts on a photo frame then take the empty frame with a backing and use double-sided tape to attach the hearts to the frame in an arrangement of your choice.
    14. There you have it!

    Feature image: Pixabay

    How to make a chair posy.

    What you’ll need

    • Fresh flowers and foliage

    • Floral tape

    • Floral wire

    • Ribbon

    • Pins

    Directions

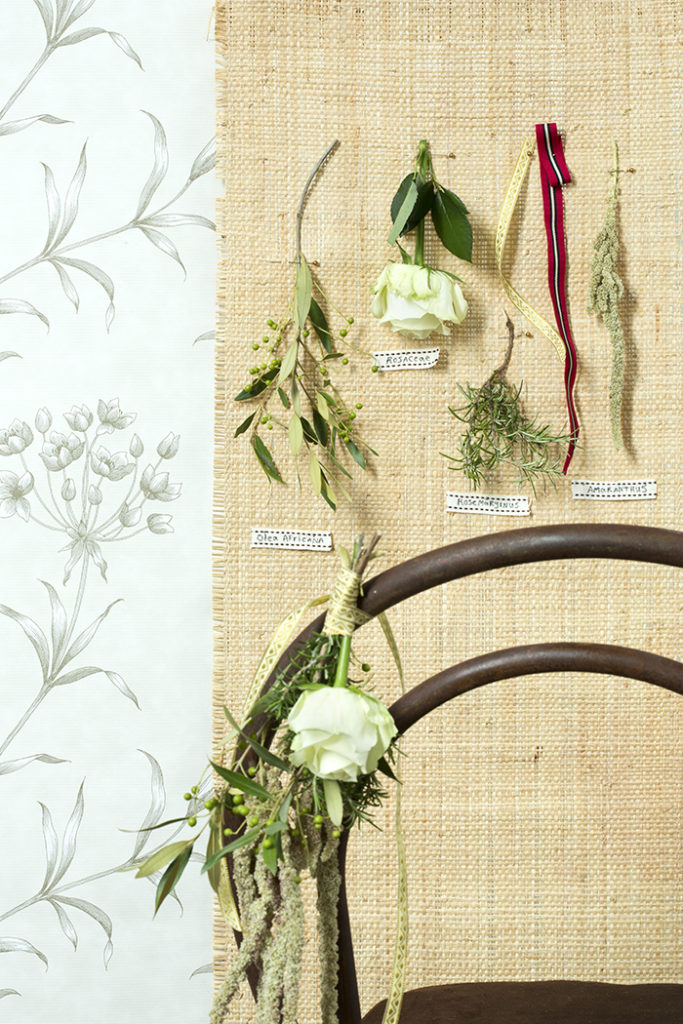
    1. In this case, we used wild olive tree leaves (Olea africana), a rose (Rosaceae), rosemary (Rosemaryinus officinalis) and trailing amaranth (Amaranthus). If you wish to use more flowers, just make sure you use odd numbers, such as one, three or five flowers, in your posy.

    2. Gather your flowers and wrap them together with floral tape.

    3. Add your greens (olive leaves, rosemary and amaranth) or whatever filler you have chosen. These can be placed between the flowers or underneath the flowers.

    4. Wrap it all together with floral tape and trim the stems if needed. Wrap the ribbon and secure the whole posy with a pin.

    TIP: Use the floral wire to support the flower heads if they are drooping

    Chair posy made by Floral Affairs. Contact them on [email protected] or visit floralaffairs.co.za

    Wedding Album | DIY | How to make a chair posy