Combine your eyeshadows with soft metallic and shimmering finishes in hues of rose gold, red-copper and bronze. Keep brows defined but natural with a clear gel or wax.
MUST-HAVES
Urban Decay Naked 3 Palette
Rimmel Brow This Way Clear Brow Gel
From the table settings to the dance floor, let your wedding signage be as playful, stylish or whimsical as you are!
1. IN LOVE WITH THE DANCE FLOOR
Faced with a plain ol’ dance floor that needs some prettying up? Why not enlist the help of an arty friend to paint a monogram in your wedding colours? It’ll be easy enough to paint over later.
2. MAKE AN ENTRANCE
A sheet of acrylic displaying the couple’s names transforms a simple plinth and floral arrangement into a grand welcome gesture.
3. TROPICAL FEVER
Embrace the tropical trend with delicious monster leaves for placemats and banana leaves as place settings (write on them with Posca paint markers).
4. MR & MRS
A vintage-style metal ampersand light sign makes a cute photo prop.
5. TOP THIS
Don’t be tied down by traditional cake toppers!
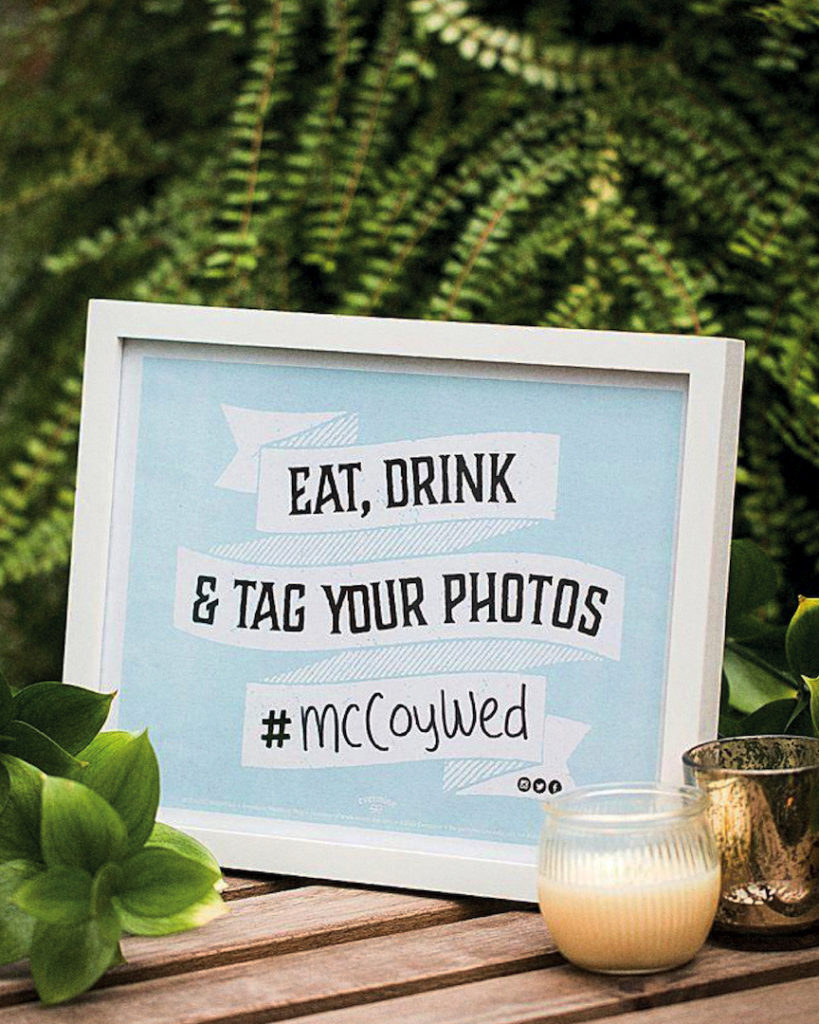
6. PERFECTLY FRAMED
A simple frame allows your message to blend in with the rest of your wedding decor.
Photography: pinterest.com/weddingalbummag
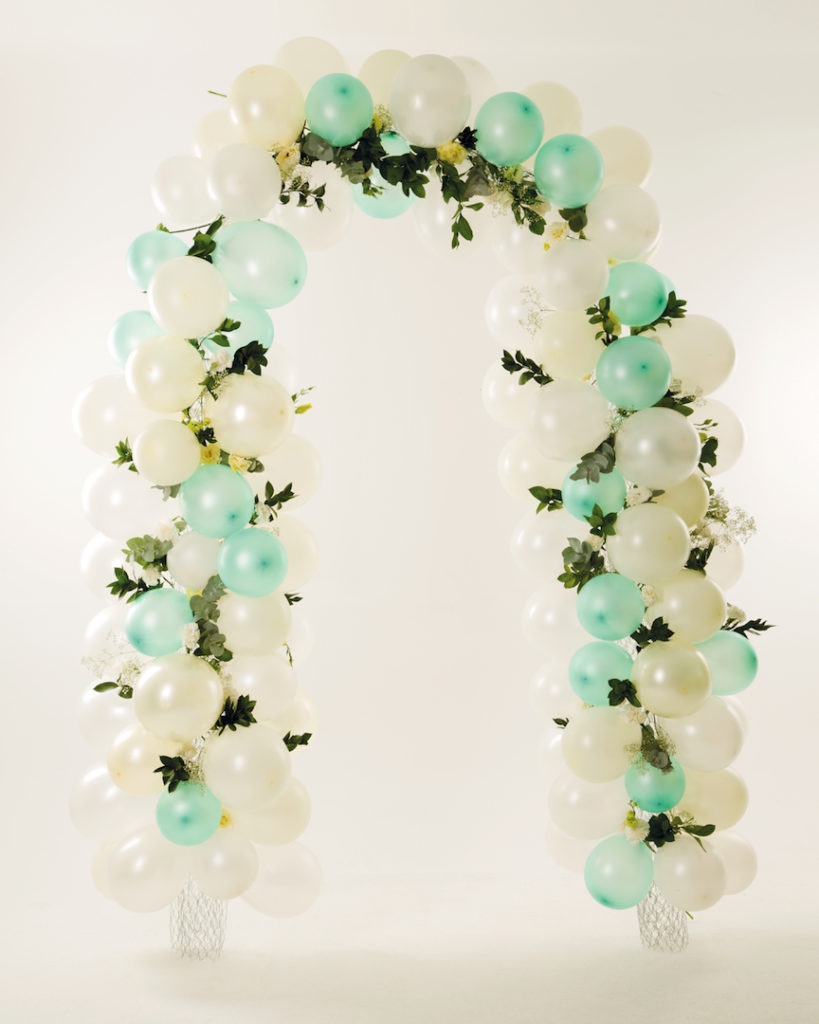
Say your I-dos under this fresh, fun balloon wedding arch. Prepare the wire structure and balloons the day before, then just add greenery in the morning.
WHAT YOU’LL NEED
6 m chicken wire
Florist’s wire
Wooden rods or fishing line
Florist’s foam
Balloons
Flowers and leaves
INSTRUCTIONS
Step 1
Roll your chicken wire lengthways into a tube and bend in the centre to create an arch. Keep the arch together by tying florist’s wire at intervals along it.
Step 2
If the arch is going outside, use sturdy wooden rods or poles to stand it upright. Insert one end of each rod into the ground at least 20 cm deep. Place the bottom ends of the arch over the rods and secure with florist’s wire. If the arch will be placed indoors, suspend it from the ceiling with fishing line.
Step 3
Insert bits of damp florist’s foam into the arch, ensuring they are hidden.
Step 4
Blow up as many balloons as you like (we used 150) and attach to the arch using florist’s wire.
Step 5
Insert your flowers and leaves into the foam, using florist’s wire to hold them in place.
Step 6
Cover any exposed florist’s foam with balloons or flowers.
Soft and tousled, straight-cut, crinkled or dyed, let these paper craft ideas in their myriad forms be a part of your wedding story.
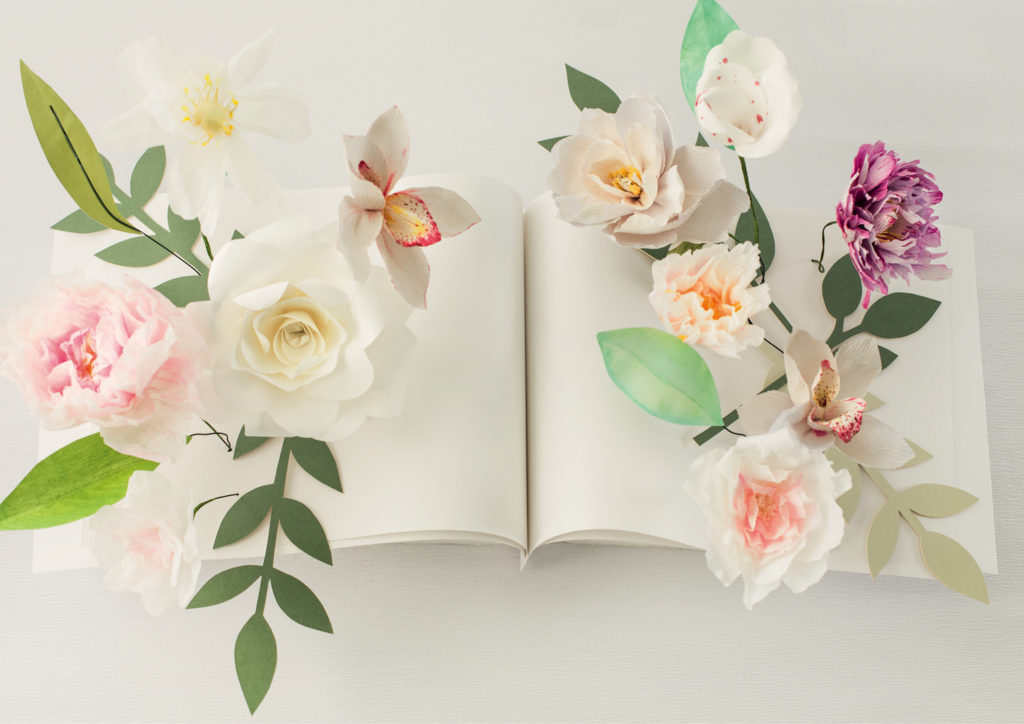
1. A message notebook as a striking centrepiece
Paper flowers, Love Paper Sew
2. Add paper flowers to your stationery
Menu, invitation with envelope and RSVP card, table number, name tags, and paper flowers, all Chrystalace Wedding Stationery
3. Paper cones with confetti
4. Sweet treats adorned with paper flowers
Nougat, MaMère Confections; paper flower, Chrystalace Wedding Stationery
5. A paper bouquet
Paper flowers, Love Paper Sew; laser-cut leaves, stylist’s own
6. A paper garland
Paper garland, stylist’s own; paper flowers, Love Paper Sew
7. Cupcakes with windmills
Cupcakes each, Florentines Cakes; paper windmills, stylist’s own
8. Chinese lanterns
Paper Chinese lanterns, The In Thing
9. A paper cake topper
Cake, Florentines Cakes; cake topper, Chrystalace Wedding Stationery
10. Hand-written thank you notes for your guests
Thank-you tag, Chrystalace Wedding Stationery; pencil crayons, The Deckle Edge; lined napkin, stylist’s own
Decor: Rochelle Malherbe
Photography: Gareth van Nelson/hsmimages.co.za
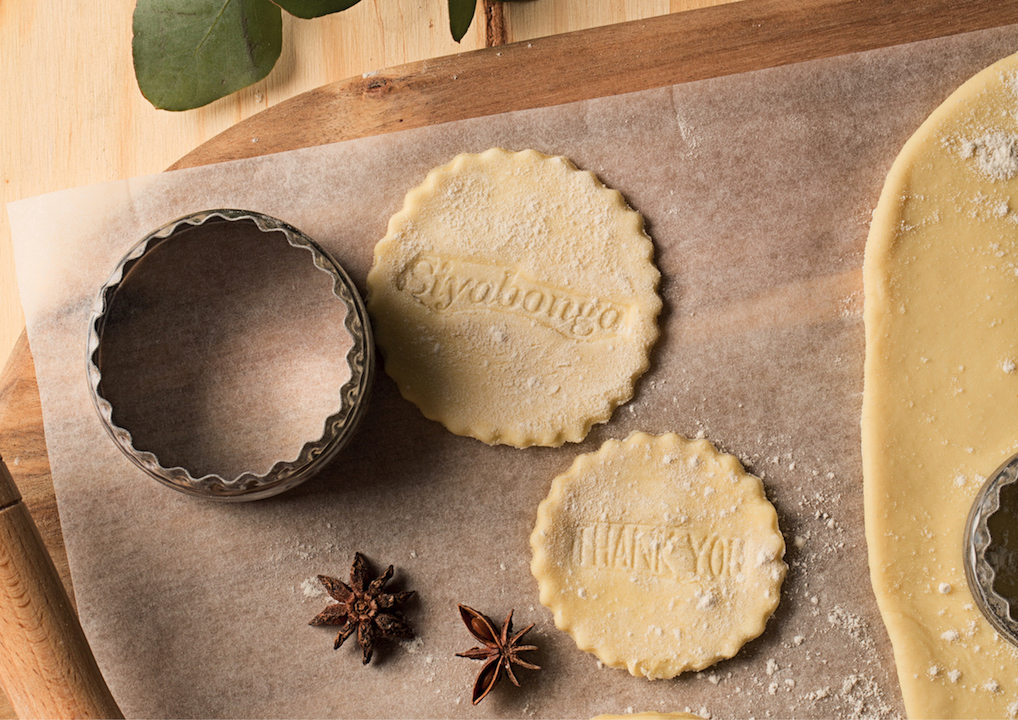
Your guests will make short work of these scrumptious thank you shortbread biscuits. We love the idea of adding a personal touch to your wedding, and this is one of the easiest ways to do this.
WHAT YOU’LL NEED
250g butter, at room temperature
½ cup caster sugar, plus extra to dust
1 vanilla pod, seeds only
2 cups flour
½ cup cornflour
Custom-made rubber stamps
Biscuit cutters
METHOD
1. Have your rubber stamps made with the greetings of your choice (you can order stamps from rubberstampsa.co.za).
2. Preheat oven to 160°C and grease a 20 cm baking tray.
3. Beat the butter until soft, then beat in the caster sugar and vanilla seeds until light and fluffy. Mix in the rest of the ingredients to form a stiff dough.
4. Roll the dough out on the baking tray so you don’t have to move it afterwards and cut them with your cookie cutters. Stamp each one with your rubber stamp.
5. Bake for 30 minutes, or until golden. Remove from the oven and immediately dust with caster sugar.
6. Carefully remove the shortbread fingers from the tray and transfer to a wire rack to cool before serving.
7. Once they’ve cooled completely, you can put your biscuits in gift boxes or tie them up with cellophane and a pretty ribbon.
Celebrate in the warm glow of candlelight and seal your love with a kiss beneath a star-studded sky by taking inspiration from our night sky themed wedding.
THE STATIONERY
Rose-gold plate to hire, Plush Props; card and laser-cut engraved envelope, Secret Diary
Laser-cut engraved envelopes and silver perspex place cards, all Secret Diary; flowers, Fleur le Cordeur
ON THE TABLE
Flowers, Fleur le Cordeur; copper goblet, stylist’s own; purple goblet, glass carafe and copper votive holder, all to hire, Check My China; whisky glass and vintage gold underplate, both to hire, Exclusive Hire; rose-gold plate, crystal wine glass, rose-gold side plate, jug and rose-gold bowl, all to hire, Plush Props
Flowers, Fleur le Cordeur; Champagne glasses to hire, Plush Props and Exclusive Hire; brass mirror tray to hire, Check My China
Floral arrangement, Fleur le Cordeur; gold cutlery to hire and purple napkin, all Check My China; navy speckled plates to hire, Plush Props; silver perspex place card, Secret Diary; glasses from to hire, Exclusive Hire and Check My China
Purple goblet to hire, Check My China; crystal wine glass to hire, Plush Props; copper goblet, stylist’s own; black plate and navy embossed saucer both to hire, Plush Props; gold spoon to hire, Check My China; crystal sugar bowl, Exclusive Hire; cherry sorbet, Sorbetière
LIGHTING
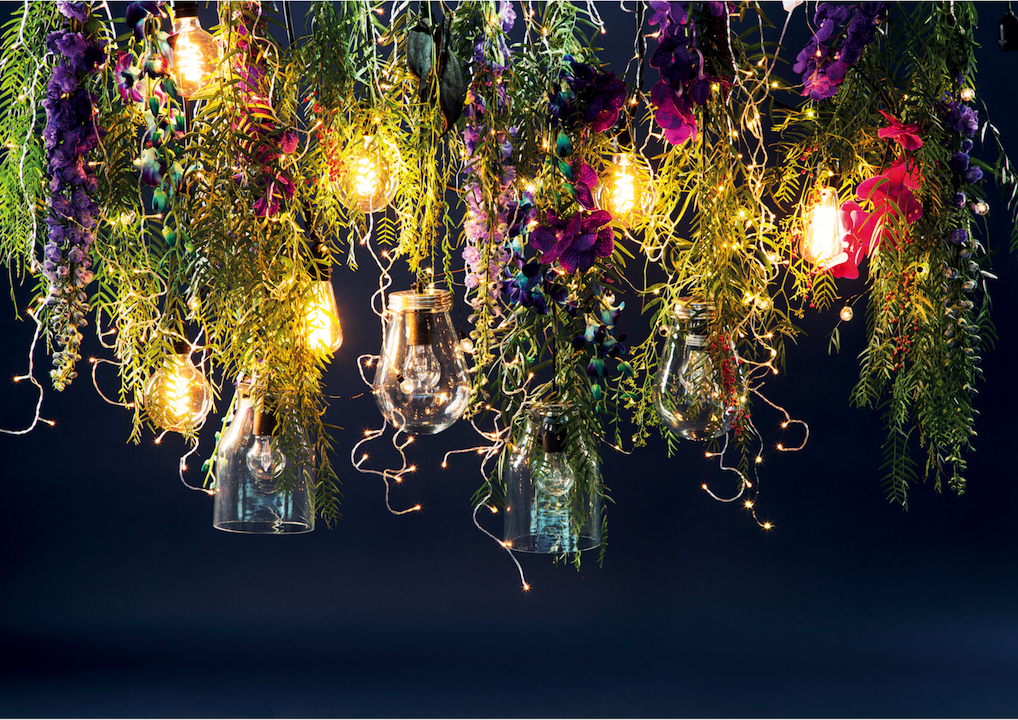
Hanging flowers, Fleur le Cordeur; LED strings, The In Thing; bulbs, all Hoi P’loy; glass pendants, Weylandt
THE CAKE
Cake, Roxanne Floquet Cake Design; cake stand, supplier’s own; flowers, Fleur le Cordeu
FLOWERS
Floral arrangement, Fleur le Cordeur; chair, @home
Fashion: Rochelle Malherbe
Photography: Gareth Van Nelson/HSMimages.co.za
*Extracted from Wedding Album 2016-1; Products are subject to change
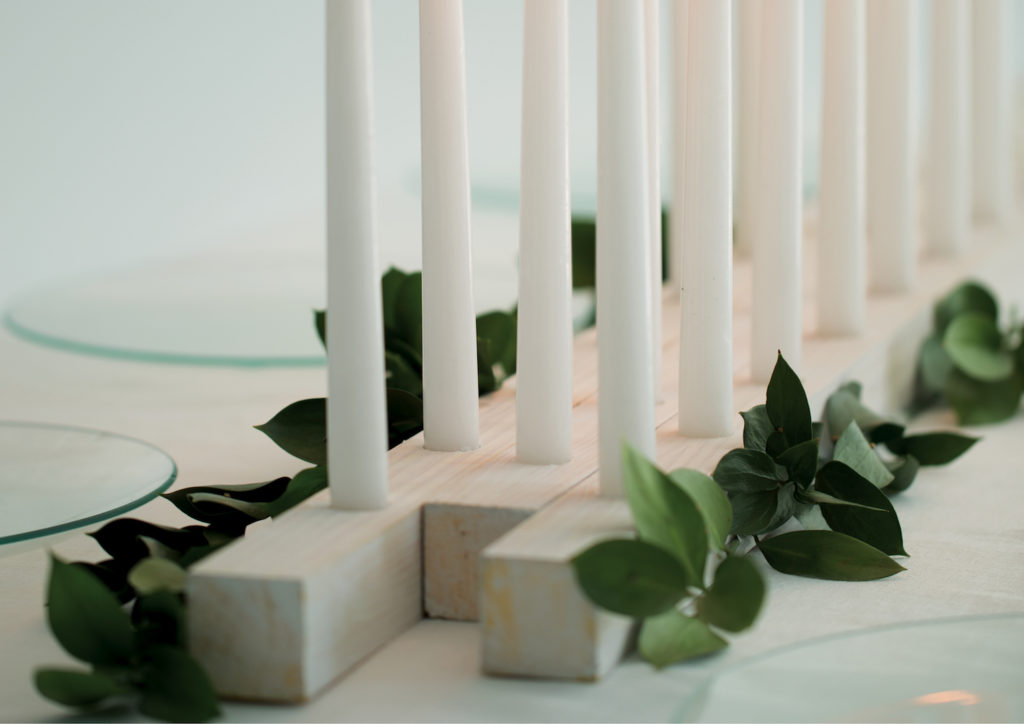
Create a striking focal point with an elegant DIY candle table runner. From there you can soften the candle base with a spray of greenery.
WHAT YOU’LL NEED
4 cm × 4 cm pine strips, cut to the desired length
Drill with 10 mm drill bit
Whitewash
Paintbrush
Dinner candles
Glue gun
METHOD
1. Drill holes 2 cm deep and 7 cm apart along the length of each piece of wood.
2. Whitewash the wood (or leave natural if preferred).
3. Insert the candles and secure with a glue gun.
Simple things such as table runners, crockery and cutlery can cost a fortune once you add them together. With these two DIYs, you can reduce the cost of your table settings without skimping on style.
PAPER PLACEMATS
What you’ll need
• Ruler
• Pencil
• 120g craft paper
• Scissors
• Fine paintbrush
• White acrylic paint
How to do it
1 Using the ruler and pencil, measure and mark the size you want your placemat to be on the craft paper. Ensure there is enough room for an underplate, a large dinner plate and cutlery. Once you’re happy, cut out the placemat.
2 Measure 2 cm from the top and sides of the placemat to create a border where you will write the name of your guest.
3 Draw the border and write out the name of the guest in pencil, then paint over it with the white paint until the pencil is no longer visible. Allow to dry and repeat for as many placemats as required.
PAINTED PLACEMATS
What you’ll need
• Plain fabric placemats
• Paintbrush
• Black fabric paint
How to do it
1 Lay out the fabric placemat completely flat.
2 Dip the paintbrush into the paint then splatter it onto the placemat. Allow to dry and repeat for as many placemats as required.
Find this DIY and more in Issue 1-2017, on sale now.
Text Robyn Lane
Styling Francoise Jeanne de Villiers
Photography Kendall-Leigh Nash/HMimages.co.za
Having a winter wedding? Give your guests a warm gift to take home with these cute – and totally easy to make! – hot cocoa favours. Plus, we’ve even created the perfect labels so you have one less thing to do – click here to download them now.
What you’ll need
• Sheet of paper
• Test tubes with corks or lids
• Hot chocolate or cocoa
• Chocolate nibs
• Mini marshmallows
• Labels printed on self-adhesive paper
How to do it
1 Roll the sheet of paper so it fits inside a test tube. Then scoop two teaspoons of hot chocolate or cocoa into the tube and add a few chocolate nibs.
2 Remove the paper and top off the tube with mini marshmallows. Close with a cork or lid.
3 Stick the printed label on the tube. Repeat for as many favours as you require.
Find this DIY and more in Issue 1-2017, on sale now.
Text Robyn Lane
Styling Francoise Jeanne de Villiers
Photography Kendall-Leigh Nash/HMimages.co.za
The art of paper folding often associated with Japanese culture has long fascinated Westerners – and for good reason. The intricate designs that result look gorgeous and are often a talking point. Which is why, inspired by one of the real weddings featured in Issue 1-2017, we found four easy origami napkin styles to wow your guests.
What you’ll need
• Square napkins in the colour of your choice
How to do it
For the windmill:
1 Fold all the corners into the centre of the napkin.
2 Fold the bottom of the napkin upwards to meet the middle then do the same for the top.
3 Fold the left side to the middle and repeat this on the right, ensuring both sides are equal.
4 Turn the napkin over nd pull out the corners from the inside until all four corners are exposed. Repeat for as many napkins as required.
For the heart:
1 Fold both sides into the middle, ensuring they are equal. Then fold in half lengthways.
2 Fold the top of the napkin down towards the bottom. The take the top and fold it sideways, creating a 90-degree line. Repeat on the opposite side by folding the bottom towards the top.
3 Turn the napkin over then take the top right corner and tuck it in. Repeat this on the left then turn over to see the end result. Repeat for as many napkins as required.
For the three-fold:
1 Fold the napkin in half from side to side, then fold from top to bottom to create a smaller square.
2 Using the top piece of fabric, roll the right corner into a tube. Do the same with the next two pieces of fabric on the right.
3 Turn the napkin so the tubes of fabric are horizontal then turn over the napkin and fold the right and left corners into the middle until they meet. Turn over once more to see the end result. Repeat for as many napkins as required.
For the sitting fan:
1 Fold the napkin in half then fold the bottom about 1 cm upwards.
2 Fold the same section for 1 cm towards the alternate side of the napkin. Continue folding for 1 cm on alternate sides until you have about 3 cm left.
3 Fold the napkin in half with the folded pieces horizontal. Then fold the leftover fabric into the centre and pull out all the folds into a fan. Repeat for as many napkins as required.
Find this DIY and more in Issue 1-2017, on sale now.
Text Robyn Lane
Styling Francoise Jeanne de Villiers
Photography Kendall-Leigh Nash/HMimages.co.za