Category

Beauty

Category

Your wedding look is one of the most important parts of your big day, and you want to look your absolute best. That’s why choosing the right look, and the right makeup artist, are so essential. Sometimes, you’re not exactly sure what you want or what would work for you. Your makeup artist should be the one to give advice, help you try out different styles and ultimately just get you.

We chatted to Rachelle Froneman, Makeup Expert and Retail Manager for Eastgate Partnered Free Standing MAC Cosmetics to get the inside scoop on how to get the best from your makeup artist, so they can make you shine.

Q: What is trending in wedding makeup in 2020?

A: Fresh face, soft and romantic colors that enhance your natural beauty. Choosing a classic look for your wedding will never go out of style.

Q: How do you help a bride decide on her wedding look?

A: I always ask the bride about her theme and style for the wedding first. Then we can create a look for her, choosing either a lip focus or an eye focus. It’s great when brides come with a reference of a makeup look they like and then we can customize it to her skin tone, eye shape and face shape.

Q: What part of doing a client’s makeup is the hardest for artists?

A: When the client is unsure of what she wants, it feels like a guessing game and can sometimes get frustrating for both the client and the artist.

Q: What do brides do that makes your job harder?

A: Telling us what to do in every aspect of the makeup application. It makes the artist feel like the bride would rather just do it themselves!

Q: What are things brides should keep in mind when hiring a makeup artist?

Cancelling at the last minute makes things really hard on everyone. Also keep in mind that you booked your artist for a specific time frame to be able to finish the makeup and asking them to also just “quickly” do the cousin’s makeup too and the aunt and three other bridesmaids for free, is not cool. Makeup is a skill that artists study and practice for years, and it would be unfair to expect the artists to do more than you pay for.

Q: What is your favorite part of doing makeup for a wedding?

The end result! Seeing everything come together and the look on the bride’s face. It really is a glow like no other.

Q: And your least favourite part? Why?

Cleaning make up brushes…it looks like a makeup explosion in your kit.

Q: Any interesting requests you have had?

Nothing funny or weird, but brides always want you to drink champagne with them and celebrate! And most times the bride wants to take you home with them to be their personal makeup artist, which is quite a compliment.

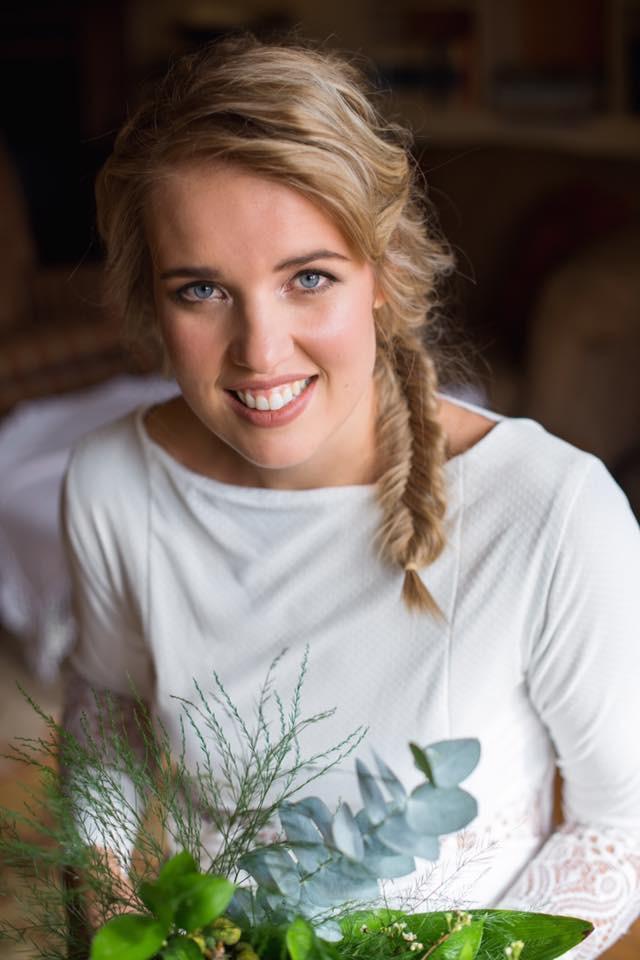
Here are some looks created by Rachelle:

Credit: Supplied
Credit: Supplied
Credit: Supplied

Image: Pexels

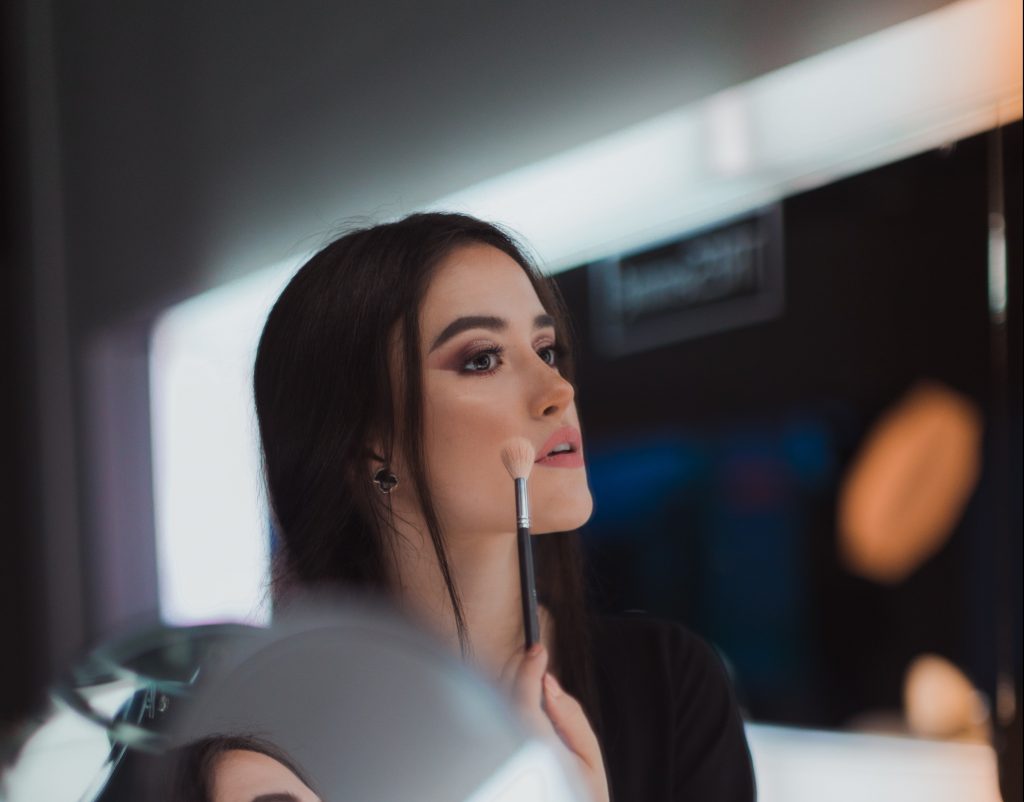
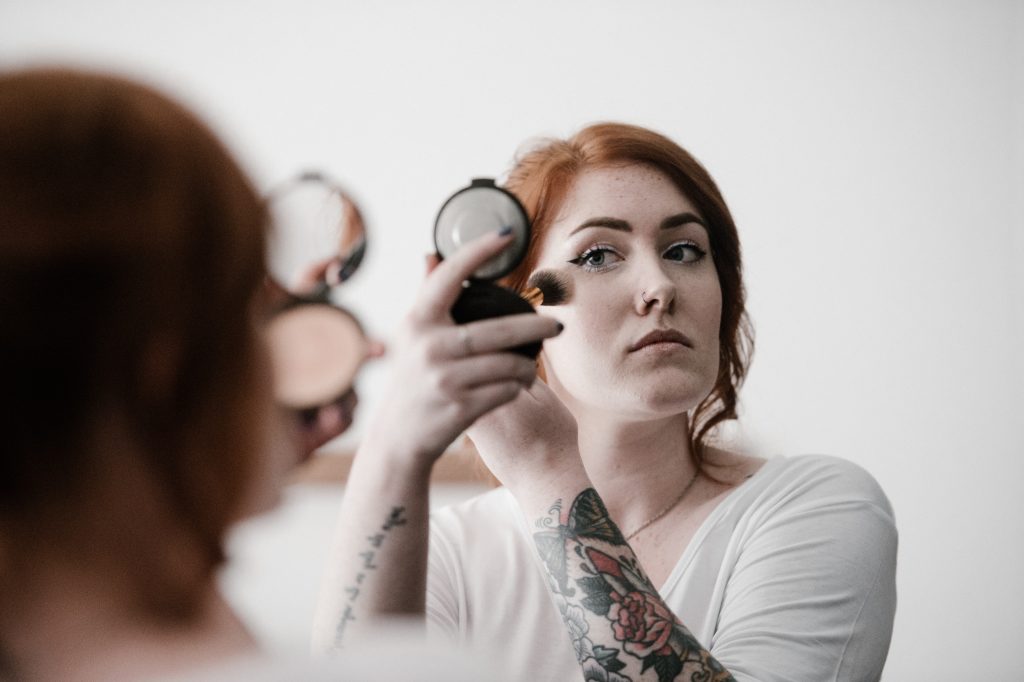
Who doesn’t love a good glow? For the last few years, highlighter has become a crucial makeup step for many beauty lovers. Show off those popping cheekbones with a shimmering streak of highlighter that will liven up your look on your big day.

Highlighters come in a variety of shades to work for any skin tone. Whether you’re looking for a rose gold, pearl, golden or bronze finish, these tried and tested formulas will leave you looking like a glowing goddess. Here are our top picks:

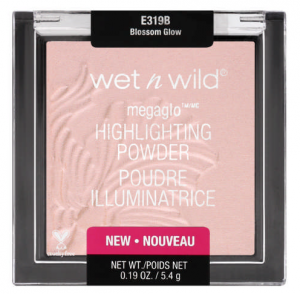
Wet n Wild Megaglo Highlighting Powder Blossom Glow – R64.95 from Clicks

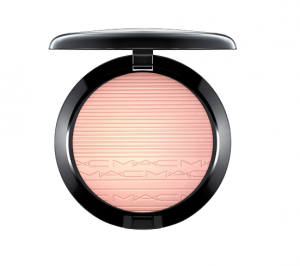
MAC Extra Dimension Skin Finish – R 495.00 from MAC South Africa

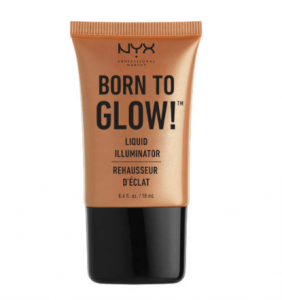
NYX Professional Makeup Born To Glow Liquid Illuminator Pure Gold – R159.95 from Clicks

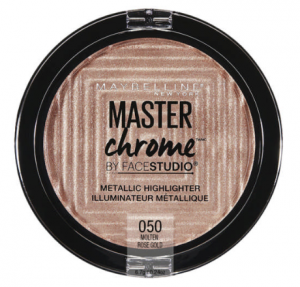
Maybelline Master Chrome Metallic Highlighter – R 265 from Dischem

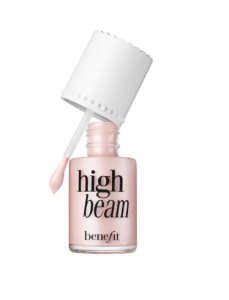
Benefit High Beam Liquid Highlighter – R195 from Edgars

Feature image: Unsplash
 

Brides opt to do their own makeup for a multitude of reasons. Maybe you want to save more money, maybe there’s a specific look you want or maybe you just enjoy doing makeup. Regardless of the reason, you’ll want to make sure you’re prepared to take on this task.

Here are some tips to have you looking your best on your big day.

Keep your location, theme, wedding dress and weather in mind:

First things first, think logistics. If you’re going for a specific theme for your wedding, you don’t want to stick out like a sore thumb with your makeup. For example, a bold smokey eye might clash with a botanical-inspired wedding in a local garden. You also have to consider how the wedding might affect your face beat. If it’s going to be hot, you’ll want to use products that reduce oil and won’t melt too drastically in the heat.

Start with eyes first:

If you’re doing a specific eye look, its best to start there first before applying your face makeup. This way, you can clean up any fallout and avoid the dreaded mascara flecks on your under eyes.

Don’t go beyond your abilities:

Love a bold winged liner but whenever you try, it ends up looking like a chunky piece of liquorice on your eye? You’re not alone. Yes, there are so many trends and looks that are beautiful but if you can’t do it, you’ll end up frustrating yourself on what is meant to be a happy day. Stick to what you know and you won’t start your day cursing the heavens above for your wonky cut-crease.

Practice, practice, practice:

Ideally, you want your makeup application to be stress-free and easy. The best way to do this is to practice your final look a few times so that it becomes second nature. Before your wedding day, make sure to give your application three trial runs in which you time yourself to see how long it takes to complete your look. Make sure to also wear your look throughout the day to see how it wears, and take photos under a variety of lighting to see how your look will photograph. No one wants flashback on their big day!

Blend the day away:

Every part of your makeup will be made so much better if you remember the cardinal rule: blend! Want flawless skin? Blend. Perfectly diffused eyeshadow? Blend. Remember to blend your foundation down your neck, chest and even onto your ears to maintain an even finish.

Give yourself time:

Please, please do not leave doing your makeup to the last minute. You might end up feeling rushed and end up not doing as great a job as you would have liked. Ideally, you should set aside an hour and a half to do your makeup, and still have plenty of time afterwards for any final touches once you’ve got your full look on. Remember, this is your big day and you want to look your best!

Also read: How to find your best foundation fit

Feature image: Pexels

On your big day, you want to look like the best version of yourself. As the literal base of your makeup, foundation helps to create an even, flawless complexion on which you can build to achieve your perfect look. Foundation is not one-size-fits-all, and its important to find the one that works best for you (if you choose to wear foundation at all).

The type of foundation you choose will depend on the finish you desire, and it can be quite tricky to figure it out if you’re not a beauty guru. Fear not, we’ve got the breakdown. Finding the right foundation for your skin requires you to consider four different elements: coverage, type, finish and shade.

Coverage

Foundation comes in three main types depending on the amount of coverage you want: full, medium and sheer coverage. This is up to personal preference. Full coverage gives you the most even, flawless finish, while a sheer coverage or a tinted moisturiser will mostly give an overall skin-tint and slightly cover a few blemishes. Medium coverage falls somewhere between these two, offering up buildable coverage that evens out your tone while still allowing your skin to shine through.

Type

Once you’ve decided on the coverage you want, you can begin to look at foundation types. Foundation generally come in liquid form, in a stick, as a whipped mousse and as a powder.

Liquid foundation is the easiest and most accessible to use. Liquid glides on easily and blends the best for the most even finish, however it can exaggerate oil-prone skin. It can be applied using a brush, beauty sponge or even your fingers.

A stick foundation is creamier and thicker in consistency than a liquid foundation. However, there is quite a bit of buffing that is required with this foundation to make sure you get an even look. Stick foundations are perfect for contouring and highlighting, as it gives a great colour-payoff that can be blended more naturally into the skin than powder.

A whipped mousse foundation is a liquid foundation that has air incorporated into it, lightening up the texture. This light-weight foundation blends easily and works well for all skin tones.

Powder foundation is easy to apply as it generally requires less blending and comes in a convenient compact case. Powder foundation is perfect for someone who wants a lighter, more matte look. However, it can be quite drying and is generally not great for someone already predisposed to dryness.

Finish

Once you’ve locked down the coverage and type of foundation you want, your second-to-last step is to choose your finish. These are the main foundation finishes:

– Matte foundations eliminate sheen on your face, making it perfect for those with oily skin. Those with blemish or acne-prone skin will like this finish as it provides a poreless filter to the skin. Dry, more mature skin should steer clear of this finish as it can accentuate problem areas.

– Dewy finishes give the wearer a soft, glowing look to the skin and is perfect for dry skin and mature skin as it appears more youthful.

– A Satin finish falls between matte and dewy: close to full coverage but in a more natural way. This finish compliments all skin-types.

Shade match

Unfortunately, the last step is always the hardest. Shade matching your skin to a foundation can be incredibly difficult, especially in store where lighting is not exactly optimal. The key thing to take into account is your skins undertone.Warm undertones reflect traces of red and gold in their skin and typically tan very easily. Cool undertones have hints of ink and blue in their skin and are prone to burn more easily in the sun. A neutral undertone falls in the middle, with an equal mix of cool and warm tones.

When in doubt, many makeup artists create a foundation cocktail, mixing together two or three shades to get the closest match. Don’t be afraid to experiment!

Feature image: Unsplash
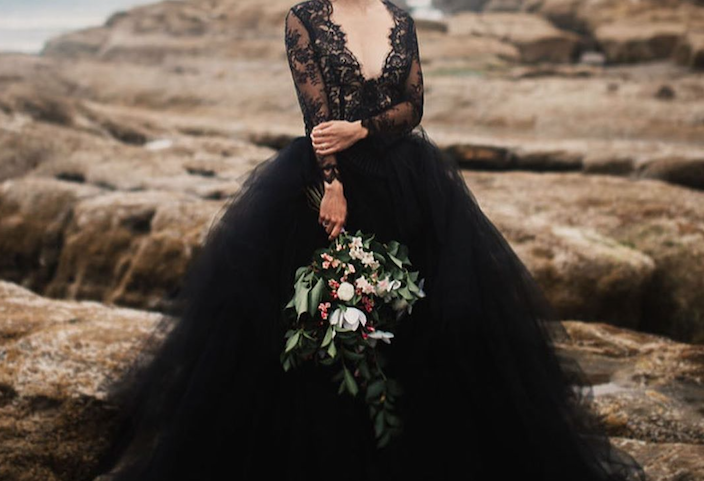
Nothing is set in stone, least of all what colour your wedding dress should be. We’re all about taking fashion risks and if black is your thing, we say go for it. It doesn’t have to be gloomy. If you do it right, a black gown can be classy, sassy and gorgeous. Take a look at these brides who are beautiful in black:

https://www.instagram.com/p/B5c78Fqjbpk/

https://www.instagram.com/p/B8fMQnyHtDz/

https://www.instagram.com/p/B8bzf6qKbVd/

https://www.instagram.com/p/Bcokqo8A9H3/

https://www.instagram.com/p/B6TyMExgFCW/

https://www.instagram.com/p/Bx4vfzNF5WV/

https://www.instagram.com/p/Ba4Jqhjhk-D/

https://www.instagram.com/p/B8ZIIGUhTJQ/

Image: Instagram/nanadu_wedding

We’re willing to bet you’d do a lot to ensure that your face looks perfect on your wedding day. Of course you can do some pre-wedding bridal skin care to ensure that your skin is spotless, but what about your makeup?

That’s what makeup trials are for! It’s the best way to ensure that you’ll have the exact look you’re dreaming of on your special day. Here’s what you should prepare for:

– Knowing your look

Explaining your daily look will most likely be a requirement.

Make-up artists will want to know what your “go-to” look is, in general. They’ll try to find out what you look like on a day-to-day basis, what you look like at work, and what you look like when you’re out having fun. The reason for this is that, ultimately, your wedding makeup should have you looking like the best version of yourself, instead of completely different.

– Hair comes before makeup

Your MUA needs to know what your hair will look like. There are two reasons for this.

On your wedding day, your hair should be done before your makeup. This means that if you’re planning on using hair accessories or wearing your hair down, your makeup artist will need to plan ahead as to how they will (practically) apply your makeup.

Your makeup style also needs to match your hair style. For this reason, you need to have an idea of your hair look for your makeup trials too.

– Come with ideas

Pictures help the MUA to understand the look you’re dreaming of. Fill up that Pinterest board and have them scroll through it. They’ll appreciate the guidance!

– It will take time 

You may want to test a few different styles. This means the appointment will be quite long. Ensure that you’re ready for it.

If the trial doesn’t go well, you may want to book another or try a different MUA. You need to be prepared for this to happen, so book your makeup trial well before your wedding day.

– Discussing money 

You’ll have to be prepared to talk pricing during your makeup trial. Let the MUA know where they’ll need to be, how many bridesmaids you have, and any other important information. This will all affect the final cost.

Image: Unsplash 

Demi-Leigh Nel-Peters has been serving us looks for years, but her latest one might just be our favourite. The former Miss Universe tied the knot to American footballer Tim Tebow in spectacular style recently, and her bridal makeup has captured our hearts.

Creating her own spin on soft glam, Demi-Leigh’s makeup artist, Renee De Wit, worked with the models stunning features to enhance her natural beauty on her big day. Here’s how to achieve Demi-Leigh’s soft glam face beat.

https://www.instagram.com/tv/B7vNr-UhjTO/?utm_source=ig_web_copy_link

Using a mix of Smashbox Studio Skin and Chanel Ultra le Teint foundation, De Wit created a dewy, flawless base. She completed the face with the Sensai highlighting concealer, Bobbi Brown Pot Rouge in the shade Fresh Melon to give the cheeks a gentle flush of colour and the Dior Backstage Glow face palette to perfectly highlight Demi-Leigh’s cheekbones and the high points of her face.


Smashbox Studio Skin available at Foschini Beauty for R580.

Bobbi Brown Pot Rouge in the shade Fresh Melon available on Bobbi Brown.co.za for R490

The focus of this look is definitely the eye makeup. De Wit opted for a soft brown smokey eye, using the Urban Decay Born To Run Palette and Dior 5 Colours 757 palette to create a blended crease shade. Remember to diffuse the shadows outwards towards your eyebrows to create a catlike effect that is ultra feminine.

The lid shade comes from the Huda Beauty Rose Gold Palette. Chanel Waterproof eyeliner in Espresso smudged and layered with Bobbi Brown Long wear Gel liner pot mixed with Inglot Duraline sealer was used to achieve a soft angled liner.

Urban Decay Born To Run Palette available on Urban Decay.com for R800

Bobbi Brown Long wear Gel liner available on Superbalist R420

Line the lips with the Charlotte Tilbury Pillow Talk lip liner before filling in the centre with a warm mid tone nude. De Wit opted for MAC Retro Matte lipstick in Lady Be Good and the Bobbi Brown Brownie Pink lipstick. Of course, don’t forget to lock the look in with a stronghold setting spray. De Wit chose the Urban Decay All Nighter setting spray.

MAC retro matte in Lady be good available at MAC for R330.

Urban Decay All Nighter setting spray available at Foschini Beauty for R860.

Feature image: Instagram / Tim Tebow

Whether you’re a super low-maintenance gal or simply want to cut costs by doing your own bridal make-up on your wedding day, these three easy-to-create looks using RED DOT Cosmetics will ensure you don’t go barefaced.

Watch the full video below then scroll down for the full list of products we’ve used. Bonus: Enter our competition to win a RED DOT Cosmetics product hamper worth R675 here.

Makeup products used in the video above:

Look 1

Cosmetics Forever Eyeshadow in 11 Dark Brown
Cosmetics Forever Eyeshadow in 10 Twisted Brown
Cosmetics Forever Eyeshadow in 09 Nougat
Cosmetics Forever Eyeshadow in 02 Beige
Cosmetics Catchy Eyes Mascara
Cosmetics Velvet Touch Lipstick in 009 Matt Sweetness

Look 2

Cosmetics Forever Eyeshadow in 10 Twisted Brown
Cosmetics Forever Eyeshadow in 11 Dark Brown
Cosmetics Forever Eyeshadow in 12 Dark Grey
Cosmetics Forever Eyeshadow in 05 Grey
Cosmetics Forever Eyeshadow in 06 Plum
Cosmetics Catchy Eyes Mascara
Cosmetics Velvet Touch Lipstick in 159 Boheme

Look 3

Cosmetics Forever Eyeshadow in 02 Beige
Cosmetics Forever Eyeshadow in 11 Dark Brown
Cosmetics Giant Pro Liner
Cosmetics Catchy Eyes Mascara

Glowing skin is always a good thing. On your wedding day you’ll want to look your best, and one of the ways to achieve that is by treating your skin. If you haven’t got a spa budget, however, there are a number of at-home face masks you can make yourself. Give yourself the gift of a glow-up without the expensive price tag by making your own all-natural treatments.

These masks are all natural and all good for your skin. Your biggest challenge will be to stop touching your face afterwards and marvelling at how smooth it feels.

Pumpkin smoothie – enhances skin elasticity and hydration

Ingredients:

  • 1/4 cup canned pumpkin (frozen)
  • 1/2 cup almond milk
  • 1/4 banana (frozen)
  • 1 tsp cinnamon

Blend all the ingredients together in a blender for one minute at high speed. This will form a paste that you can apply to your skin and leave on for 15 minutes before rinsing with lukewarm water. Pat dry with a face towel and apply moisturiser.

Pumpkin is packed with vitamins, minerals, enzymes, and antioxidants that will boost your skin’s elasticity, circulation, and hydration. Almond milk will provide moisture, while the banana also helps enhance skin’s elasticity. Cinnamon acts as a natural antioxidant and has antibacterial properties.

Aloe vera mask – fights acne

Ingredients

  • 2 tablespoons aloe vera gel
  • 1 tablespoon milk
  • 1 tablespoon sugar

Mix the milk and sugar together until the sugar dissolves, then add the aloe vera and blend until you’re left with a paste. Apply to your face and neck and leave on for 20-30 minutes before rinsing with lukewarm water. Pat dry with a face towel and apply moisturiser.

Aloe vera is a wonder plant that has multiple skin benefits to ease burns, sunburns, irritation, allergies and even acne. The milk also helps to soothe skin, while sugar is a natural source of glycolic acid that aids in cell turnover.

Honey citrus mask – boosts glow

Ingredients:

  • 1 tablespoon orange juice
  • 1/4 cup of honey

Mix the orange juice and honey together until it creates a gel. Apply to your face and leave it on for 15 minutes. Remove with lukwarm water, pat dry with a face towel and apply moisturiser.

These ingredients are amazing at brightening your skin, replacing dullness with a beautiful glow.

Bonus: Brown sugar exfoliant

Ingredients:

  • 1 tablespoon brown sugar
  • 2 splashes of olive oil

Mix the brown sugar and olive oil together and apply to your face. Massage the misture into your skin with gentle circular motions. Rinse with lukewarm water, pat dry with a face towel and apply moisturiser.

The sugar acts as a gentle exfoliant and aids in cell turnover, while the olive oil provides moisture that will leave your skin feeling soft, smooth and supple.


Feature image: Pexels

Removing all or some of your body hair is a personal choice, and we’re firm believers in doing whatever works for you. Many men and women do choose to wax, though, especially before the big day and long-awaited honeymoon. However, it’s not a very pleasant thought when making that waxing appointment. Often accompanied by pain, discomfort and even skin conditions like rashes or in-grown hair have made many skeptical of this procedure.

We take a look at the other options out there, which may just make things slightly easier and prevent you from getting in a sticky situation.

Sugaring

This method makes use of a sugar mixture which is applied at body temperature. That already means there is no chance of burning as is sometimes the case with wax. The sugar paste does not stick to live skin cells, only to hair and dead cells – giving the best exfoliation and leaving your skin smooth when the dry paste is removed. Although not completely painless, sugaring is considerably less painful than waxing.

Laser

Laser treatment’s biggest perk is the fact that it leads to permanent hairlessness over a long time if that’s what your goal is. However, it is quite expensive and you might still have to go for up to six treatments per year, depending on your hair growth and other factors like the quality of the laser machinery. Also, not completely pain-free, but most women say that it is definitely less painful than waxing.

Electrolysis

Different to laser treatments but working on the same basic principle, a probe emitting shortwave radio frequencies is applied to hair follicles to stop new hair from growing. This damages your hair follicles to prevent growth. Unlike laser technology, electrolysis is able to treat even blonde, white and grey hair.

Dry shave

It’s not groundbreaking, but it has proven to be an effective -and cheaper- alternative. Easy to do at home, a waterless electric shaver is quick and easy, with the bonus that it won’t cause in-grown hair like shaving does.

Image: Pexels